Cherwell Mappings
Use this function to map properties between a Virima Blueprint and a Cherwell Object.
|
1.
|
In the main window, click the gear icon and select Integrations > Cherwell Mappings. |
The Cherwell Mappings window displays.
|
2.
|
To add a new mapping, click New Mapping. |
|
3.
|
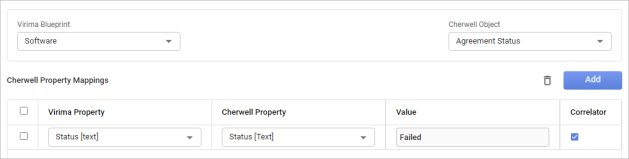
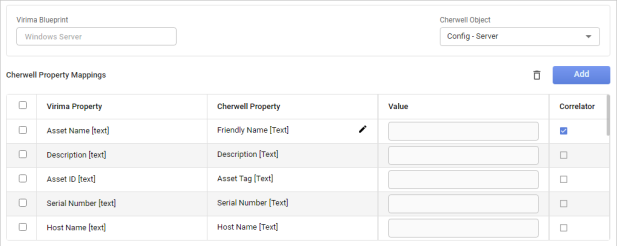
From the drop-down lists, select the Virima Blueprint and Cherwell Object. |
|
4.
|
Map the Virima Property to the Cherwell Property by selecting the propert(ies) from the drop-down list(s). |
|
5.
|
Enter a value for the property. |
|
6.
|
To correlate the properties, check Correlator. |
|
7.
|
To add additional property mappings, click the Add button in the Property Mappings area (do not click the Add button in the upper right corner of the window) and create the applicable mappings. |
|
8.
|
To remove an unused property, select the line, and click the trashcan icon. |
|
9.
|
When all selections are made, click the Add button in the upper right corner of the window. |
Edit Mapping
|
1.
|
From the list, select an existing mapping. |
|
2.
|
Make the necessary changes, noting the following: |
The Virima Blueprint field cannot be changed as this is a system ID.
To edit an existing mapping, click the pencil icon next to the Cherwell Property.
Enter a new or clear an existing Value.
Select or deselect if a Correlator is used.
|
3.
|
When all selections are made, click Save. |
|
4.
|
To remove the entire mapping, click Delete. |
Other Functions and Page Elements