AD User Import Scans: Comments
Use this function to add, edit and delete comments.
| 1. | In the main window, select Discovery Scan > AD User Import Scans. |
| 2. | Select the record to manage. |
| 3. | Follow the instructions below for the applicable action. |
![]()
| 1. | Click the Comments tab. |
| 2. | In the Comments window, click New Comment. |
| 3. | Enter the applicable text. |
| 4. | To add any documents, click Attach, and search for the attachment. |
| 5. | Click Add to save the comment and any attachments. |
| 6. | To leave the comment window without adding any comments or attachments, click Cancel. |
| 1. | Click the Comments tab. |
| 2. | Locate the comment to edit. |
| 3. | Click the pencil icon. The comment field displays. |
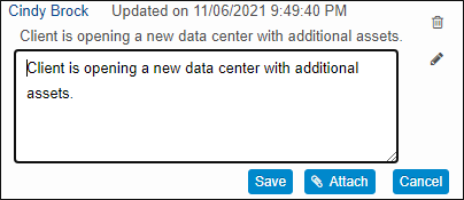
| 4. | Edit the comment, as necessary. |
| 5. | If applicable, attach any files. Refer to Adding an Attachment. |
| 6. | Click Save. The new text replaces the existing text. |
| 1. | Click the Comments tab. |
| 2. | Locate the row containing the comment to delete. |
| 3. | Click the Delete icon |
| 4. | In the confirmation window, Type Delete and click Delete. |