AD User Import Scan: Tasks
Use this function to add, edit and delete tasks.
|
1.
|
In the main window, select Discovery Scan > AD User Import Scan. |
|
2.
|
Select the import you want to manage. |
|
3.
|
Follow the instructions below for the applicable action. |

 Adding a Task
|
1.
|
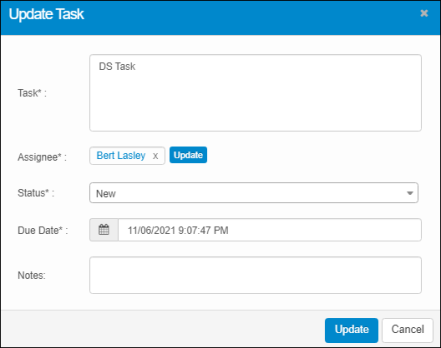
Click the Tasks tab. The Add Task dialog box displays.
|
|
2.
|
In the Task field, enter the task details. |
|
3.
|
To assign a user/group for the task, click the Add buttonclick the plus + sign. The Assignee dialog box displays.
|
|
a.
|
In the Search field, type the name of the user or group to whom you want to assign the task. |
|
b.
|
Press Enter. A list displays containing the names of all users or groups that match the search criteria. |
|
c.
|
Select the applicable user or group and click SaveAdd. The window again displays the Add Task dialog box. |
|
4.
|
In the Status field, click the drop-down list and select New, In Progress, or Closed. |
|
5.
|
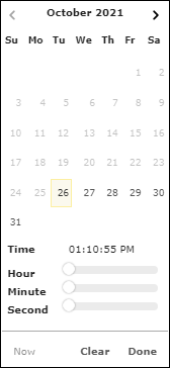
In the Due Date field, click to display the date/time selector. |
|
6.
|
Do one of the following: |
|
-
|
Click Now to populate the field with the current date/time. |
|
-
|
Click Clear to clear the selection. |
|
-
|
Click Done to save the selection and exit the window. |
|
7.
|
Do one of the following: |
|
-
|
Click Today to accept the date/time displayed. |
|
-
|
Select the applicable date and time by hovering over the hour/minute/AM or PM columns and scrolling until the desired element is shown. |
|
-
|
Click Clear to clear the selection. |
|
8.
|
Once the selections are made, click outside the date/time selector area. |
|
9.
|
In the Notes field, enter any applicable notes for this task. |
|
10.
|
When all selections/entries are made, click Add. An email notification is sent to the user that a new task as been assigned. |
Editing a Task
|
1.
|
Click the Tasks tab. The Update Task dialog box displays. |
|
2.
|
Make the applicable changes. |
Deleting a Task
|
2.
|
Click the Delete button. |
|
3.
|
In the Confirmation window, Type Delete and click Delete to confirm the deletion. |