Cherwell Mappings
Use this function to map properties between a Virima Blueprint and a Cherwell Object.
| There must be a Cherwell Credential configured before a mapping can be done. |
In the main window, click Admin > Integrations > Cherwell Mappings.
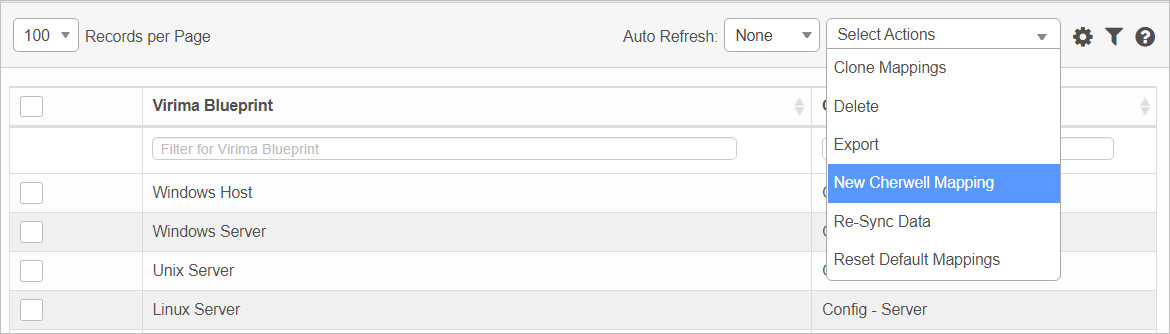
![]()
| 1. | From the Select Actions drop-down list, choose New Mapping. |

| 2. | Click the drop-down lists and select the Property, Operator and Blueprint. |
To add a mapping and set the AND parameter, click the plus icon.
To add a mapping and set the OR parameter, click the paperclip icon.
To remove a mapping, click the red X.
| 3. | In the Cherwell Object field, click the drop-down list and select the applicable object. |
| 4. | When all selections/entries are made, click Add. |
| 5. | To remove a mapping, select the line item containing the mapping, and click Remove. |
Re-Sync Data. Re-syncs all the data with Cherwell.
Reset Default Mapping. Resets all the mappings to the default.
| Not all functions include an option to edit record line items shown in the main window. |
| 1. | Navigate to the window containing the record to edit. |
| 2. | Click the line containing the record. The applicable window or dialog box displays. |
| 3. | Make the necessary modifications. |
| 4. | Click Save or Add, as applicable. |
| Deleting is a permanent action and cannot be undone. Deleting may affect other functionality and information in the application such as data in configured reports, fields in windows, selectable options, etc. Therefore, be sure to understand the potential effects before making a deletion. |
| 1. | Click the line that contains the item to delete. |
| 2. | From the Select Actions drop-down list, choose Delete. If a confirmation message is displayed, take the appropriate action (for example, click OK or Continue). |
Other Functions and Page Elements