Custom Reports
Use this function to create reports using required customized options of DB by the user. It also allows for publishing of reports to other user types.
In the main window, click Admin > Others > Custom Reports.


| 1. | From the Select Actions drop-down list, choose New Custom Report. |

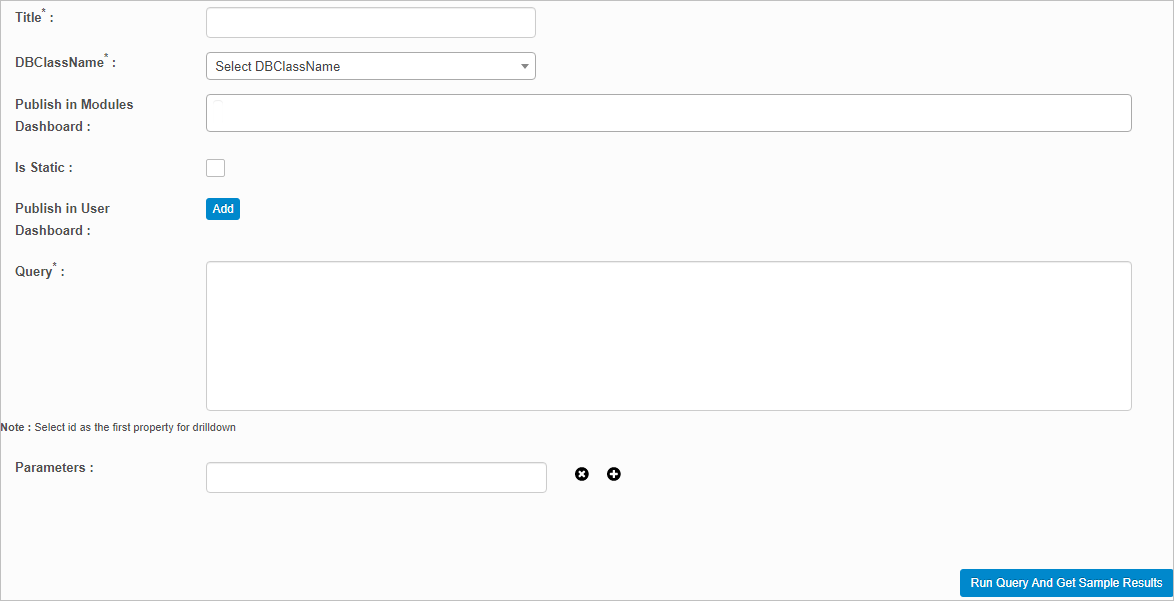
| 2. | Complete the fields, referring to the table below. |
| 3. | To view the report results based upon the parameters and values configured, click Run Query and Get Sample Results. The results are displayed in the lower portion of the window. |

| 4. | To format the reports, click Configure Presentation Details. The lower portion of the window updates and the presentation parameters and values can be entered. |

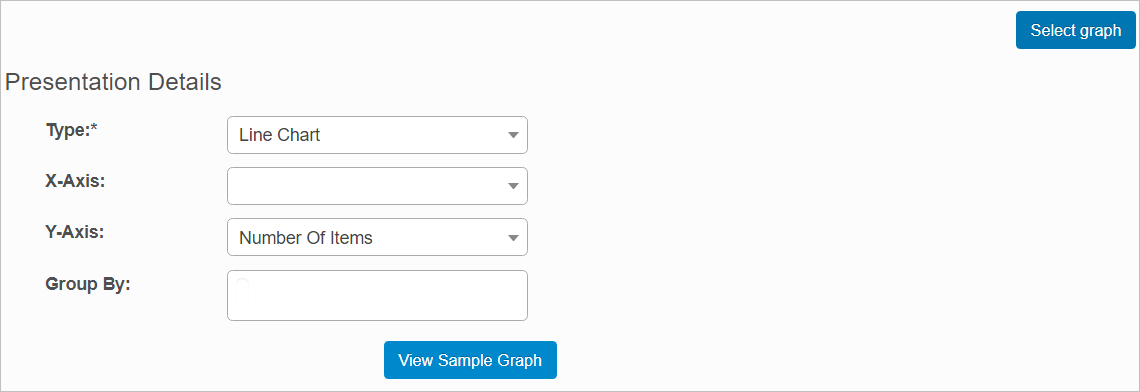
| 5. | To define the values for a graph, click Select Graph. |

| a. | Enter the presentation details. Fields with a drop-down list show valid options. |
| b. | Click View Sample Graph. The window expands and the graph is displayed. |
| 6. | When all actions are complete, click Add (when creating a new report) or Save (when modifying an existing report). |
| 7. | When all selections/entries are made, click Add. |
Custom Report Fields
| Field | Description |
|---|---|
| Title | Enter a name for the report. |
| DB ClassName | Select the required database class name from the drop-down list. |
|
Publish in Modules Dashboard |
Select the required modules into which the report should be published. |
|
Is Static |
When selected, enables the entry in Redis. |
|
Publish in User Dashboard |
Click |
|
Query |
Enter the relevant DB query. |
|
Parameters |
Enter the required parameters. To add a parameter, click the plus + sign and enter the applicable values. To delete a parameter, click the x. |
| Not all functions include an option to edit record line items shown in the main window. |
| 1. | Navigate to the window containing the record to edit. |
| 2. | Click the line containing the record. The applicable window or dialog box displays. |
| 3. | Make the necessary modifications. |
| 4. | Click Save or Add, as applicable. |
| Deleting is a permanent action and cannot be undone. Deleting may affect other functionality and information in the application such as data in configured reports, fields in windows, selectable options, etc. Therefore, be sure to understand the potential effects before making a deletion. |
| 1. | Click the line that contains the item to delete. |
| 2. | From the Select Actions drop-down list, choose Delete. If a confirmation message is displayed, take the appropriate action (for example, click OK or Continue). |
Other Functions and Page Elements