Import CIs
Use this function to upload Excel files containing CI details.
|
1.
|
In the navigation pane, select Discovery Scan > Import Data Files. The Import Data Files window displays. |
|
2.
|
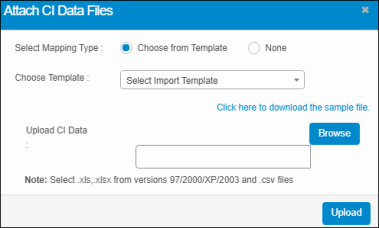
In the Select Actions drop-down list, choose Import CIs. The Attach CI Data Files dialog box displays. |
|
3.
|
For Select Mapping Type, select either Choose from Template or None. |
If Choose from Template is selected, the Choose Template field displays. Click the drop-down list and select the applicable template. To view a sample file, select Click here to download the sample file.
If None is selected, continue with the next step.
|
4.
|
In the Upload CI Data field, click Browse and select an allowed file type (such as .xls, .xlsx, .csv). The name of the selected file is shown in the field. |
|
5.
|
Click Upload. The Preview data to be imported and map columns dialog box displays. |
Preview data to be imported and map columns
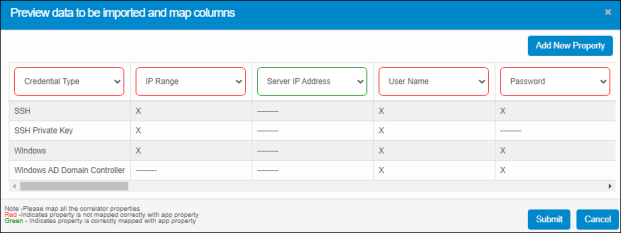
The data imported from the spreadsheet populates this window. The column names and associated properties are displayed.
| |
All properties must be mapped before you can Submit the data. Properties cannot be deleted as they may be in use elsewhere in the application. |
|
1.
|
To change the property for a column, click the drop-down list arrow and choose a property from the list. Note the following: |
|
-
|
The red and green column headings indicate if the data is properly mapped. |
|
-
|
The name of a property in this dialog box cannot be deleted or changed. The spreadsheet containing the data must be edited then reimported. |
|
2.
|
When all selections are made, click Submit. |
|
3.
|
If a property is not mapped, an Alert message displays. Map the remainder of the properties.
|
Add New Property
|
1.
|
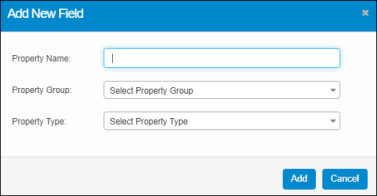
While viewing the Preview data to be imported and map columns dialog box, click Add New Property. The Add New Field dialog box displays. |
|
2.
|
In the Property Name field, enter a name for this property. |
|
3.
|
In the Property Group field, click the drop-down list and select from the groups shown. |
|
4.
|
In the Property Type field, click the drop-down list and select from the types shown. |
|
5.
|
Click Add. The property is now available as an option in the applicable drop-down menus. |
Related Topics